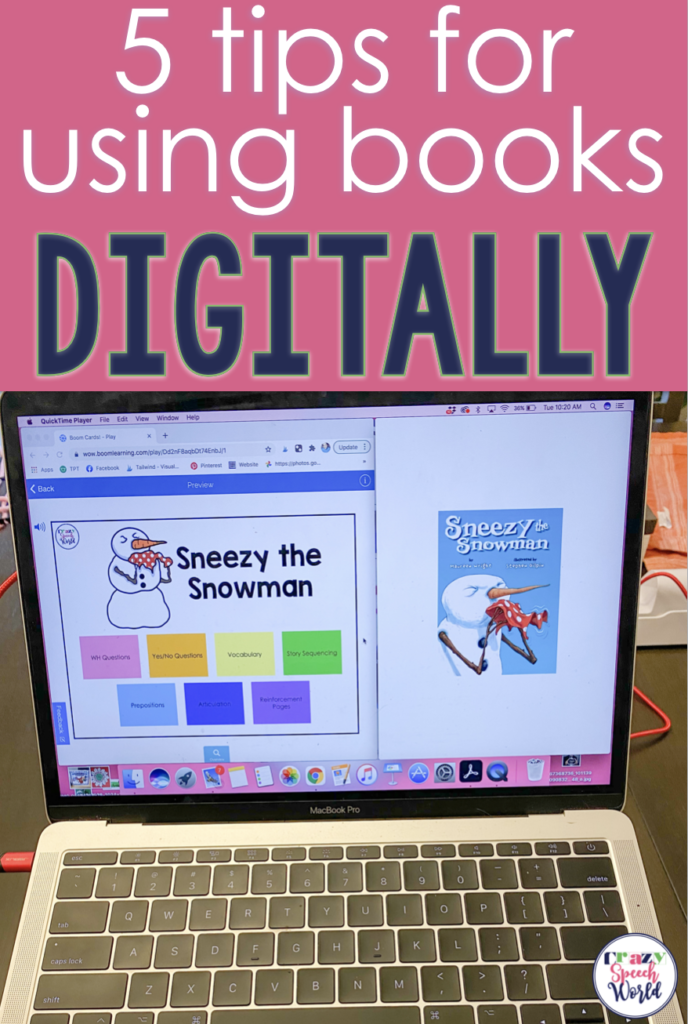
The transition to digital learning was H A R D for me, but I ended up learning so many cool things about ways to provide services. If you know me even a tiny bit, then you know that I love using books in therapy to address pretty much all the goals. So finding ways to continue to incorporate those things was super important to me and I want to share some things that worked well for me with you!
Tip 1: Doc Cam
Reading to kids via Zoom (or whatever conferencing software you use) wasn’t cutting it for me. They had a hard time seeing the book without me holding it right up to the computer camera, so I ended up buying an Osmo. This gadget is super handy and inexpensive as far as using it as a doc cam I got a full kit, but if you only want to use it for projection then all you need is the base! It does have some limitations, as the screen is small, but it worked great for me. I’ve also heard awesome things about the Hue document camera, but I never used it myself. It’s more pricey but can do a little more as far as projection than the Osmo (zooming in and out, lighted, flexible neck for positioning).
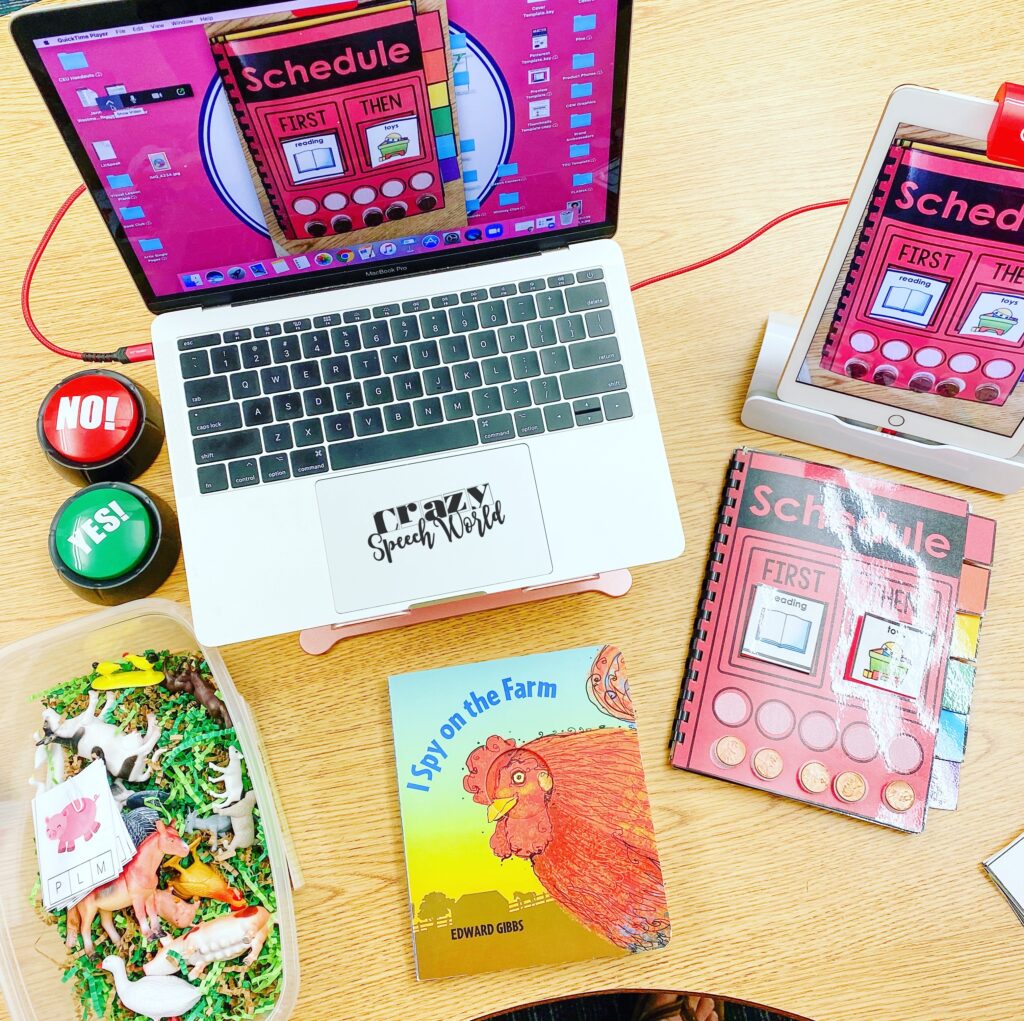
I also like this set up because you can use whatever resources you have for the book to go with the story you are reading by sharing them via the doc cam. I’ve done this with small toys, like farm animals, or paper resources I have.
Tip 2: Digital Stories
There are SO many options for digital stories! My favorite way to use digital stories is with my Kindle app. I have a subscription to Kindle Unlimited (which, if you’re a big reader, highly recommend) and for $10 a month I get access to a huge library of free books. They change often, so you aren’t stuck with the same choices all the time.
I also love using Storyline Online, Vooks, and YouTube to access stories. Storyline Online has famous readers sharing the books and as an educator you can get a FREE Vooks account! I do feel like Storyline Online and Vooks can be somewhat limiting because of the lack of number of titles to choose from. And let’s be honest, you really just never know what you’re going to get with a YouTube reading, so make sure you preview it before you share with your students.
Tip 3: Green Screens
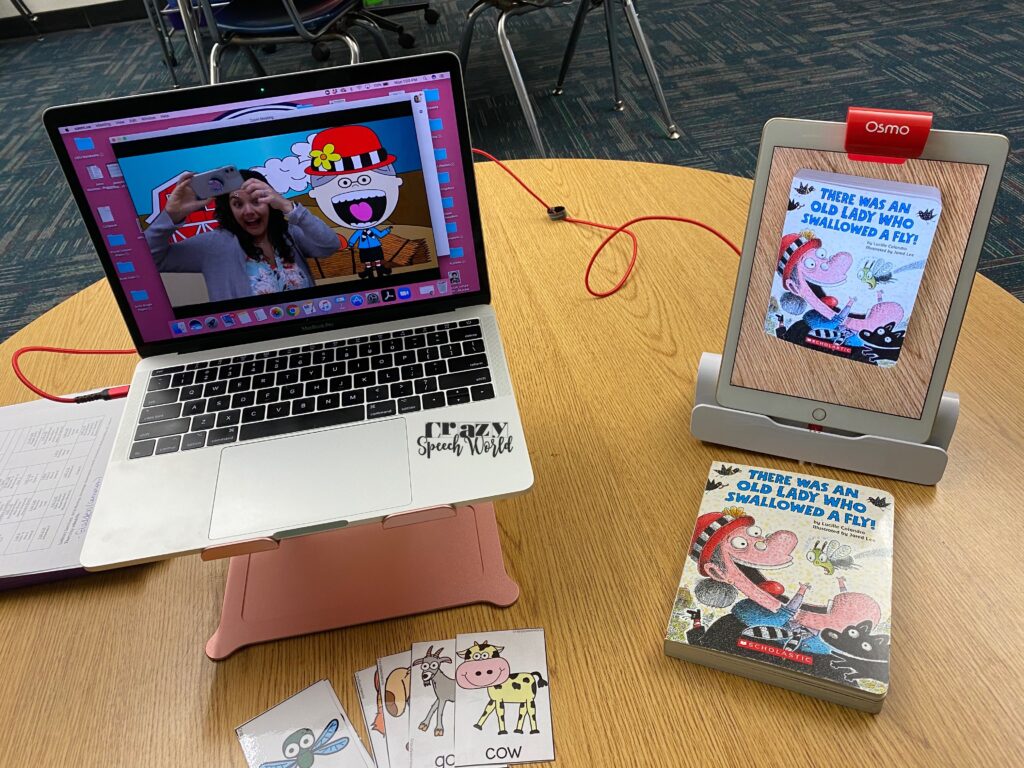
I was brand new to the green screen game, but boy did my students get a kick out of it! It’s not nearly as complicated as it sounds either! I used butcher paper from school to create my background and a pocket. If you want to see a tutorial, I have one saved in my stories on Instagram. I loved pairing it with the Old Lady stories to ‘feed’ her the items and the kids were fascinated by it ‘disappearing’.
Tip 4: Boom Cards
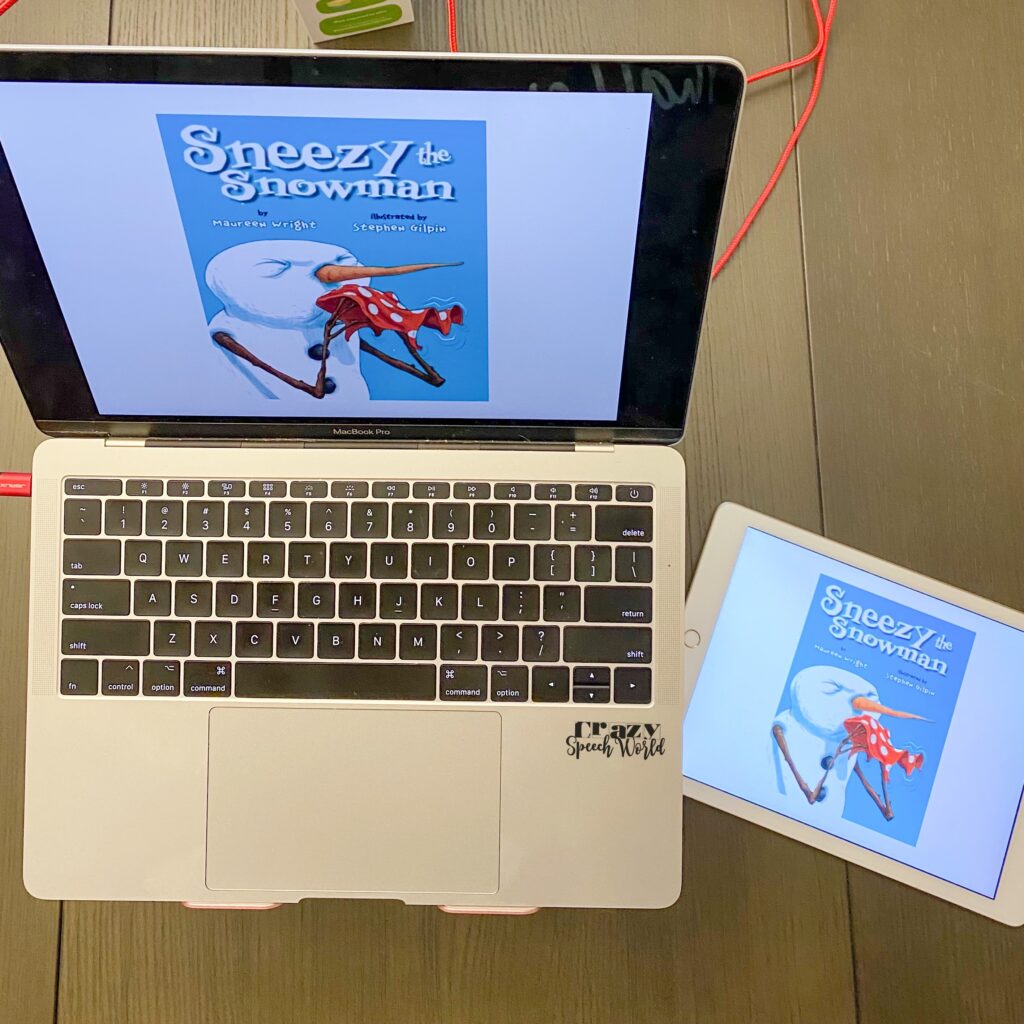
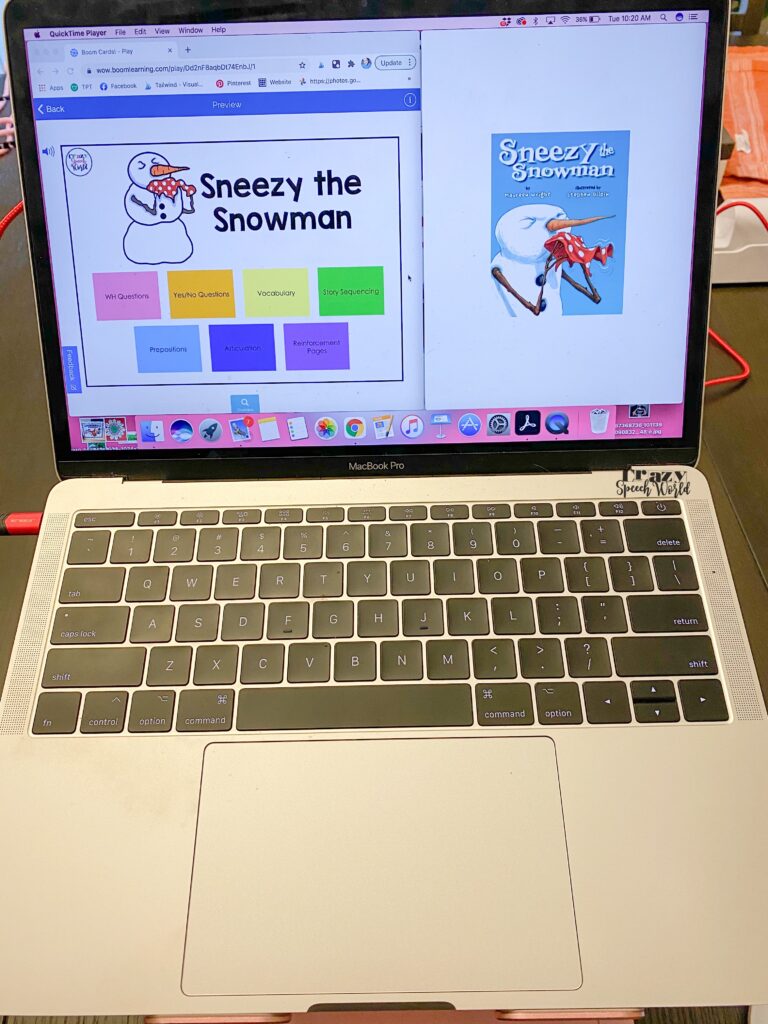
So Boom Cards have become SO popular and I have been working on transitioning my book companions to Boom Cards so that you can easily use them during your virtual sessions. I like to share my whole screen, with half being the Boom Card window and half being my iPad projecting the book, that way, if you need to go back and reference something in the story, it’s super easy! You can find my Boom Card book companions here.
Tip 5: Annotation Tools
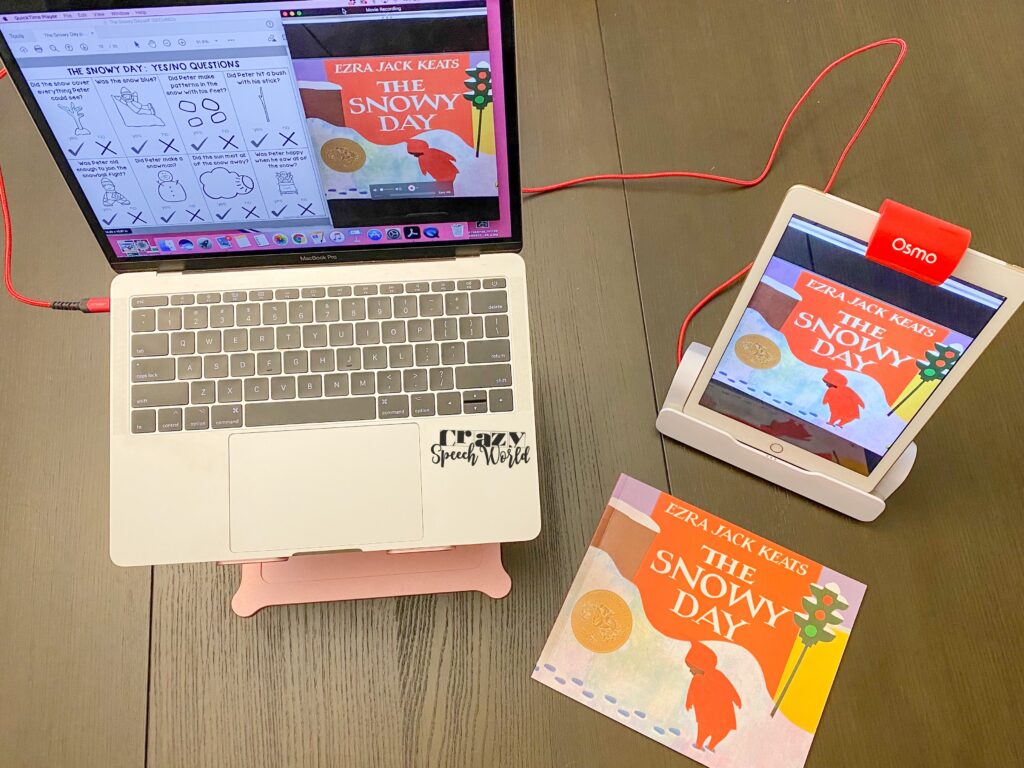
Just like with the Boom Cards, you can split your screen to share PDFs, then annotate them with a number of options. Lots of video conferencing tools have annotation built into them, so you can stamp, circle, draw on the PDF while sharing your screen. You can also use Google extensions like Kami or Web Paint. I use this most with my no prep book companions.
What tricks have you used for engaging your students in literacy based activities during distance learning?


![Using open ended activities and games in speech therapy can make planning sessions so much easier! Here are a few suggestions that worked well for me. Do you remember the first time you were faced with a mixed group and were realllllllllly unsure about what to do? I do… picture it, St. Augustine 2007 😅 I was […]](https://i.pinimg.com/236x/db/72/cf/db72cf1f6f5da00cb2a13a90872871ea.jpg)
![Using open ended activities and games in speech therapy can make planning sessions so much easier! Here are a few suggestions that worked well for me. Do you remember the first time you were faced with a mixed group and were realllllllllly unsure about what to do? I do… picture it, St. Augustine 2007 😅 I was […]](https://i.pinimg.com/236x/ae/c5/56/aec55688010e2d3489baf744dde59582.jpg)
![Using open ended activities and games in speech therapy can make planning sessions so much easier! Here are a few suggestions that worked well for me. Do you remember the first time you were faced with a mixed group and were realllllllllly unsure about what to do? I do… picture it, St. Augustine 2007 😅 I was […]](https://i.pinimg.com/236x/18/b9/e8/18b9e80227dfe1789e20a21629254f79.jpg)
![Using open ended activities and games in speech therapy can make planning sessions so much easier! Here are a few suggestions that worked well for me. Do you remember the first time you were faced with a mixed group and were realllllllllly unsure about what to do? I do… picture it, St. Augustine 2007 😅 I was […]](https://i.pinimg.com/236x/4d/34/85/4d3485a753178d000223a89b09162317.jpg)
![Using open ended activities and games in speech therapy can make planning sessions so much easier! Here are a few suggestions that worked well for me. Do you remember the first time you were faced with a mixed group and were realllllllllly unsure about what to do? I do… picture it, St. Augustine 2007 😅 I was […]](https://i.pinimg.com/236x/da/7b/c1/da7bc16b9530451d989a578236bc2bff.jpg)
![Using open ended activities and games in speech therapy can make planning sessions so much easier! Here are a few suggestions that worked well for me. Do you remember the first time you were faced with a mixed group and were realllllllllly unsure about what to do? I do… picture it, St. Augustine 2007 😅 I was […]](https://i.pinimg.com/236x/e0/21/a4/e021a465474b16201d23d0a77857935b.jpg)
![Using open ended activities and games in speech therapy can make planning sessions so much easier! Here are a few suggestions that worked well for me. Do you remember the first time you were faced with a mixed group and were realllllllllly unsure about what to do? I do… picture it, St. Augustine 2007 😅 I was […]](https://i.pinimg.com/236x/fa/94/be/fa94be15b6f184b64e2e408bc762a7e8.jpg)

I appreciate the time you took to create this post, great suggestions! How are you splitting your screen to have the book and activity?
You’re welcome! I just adjusted the windows on each one to fit both on the screen and then shared my whole screen.
How do you split the screen on Zoom? I am tech challenged!
I share my whole desktop, then resize the windows so that they both fit and are viewable.