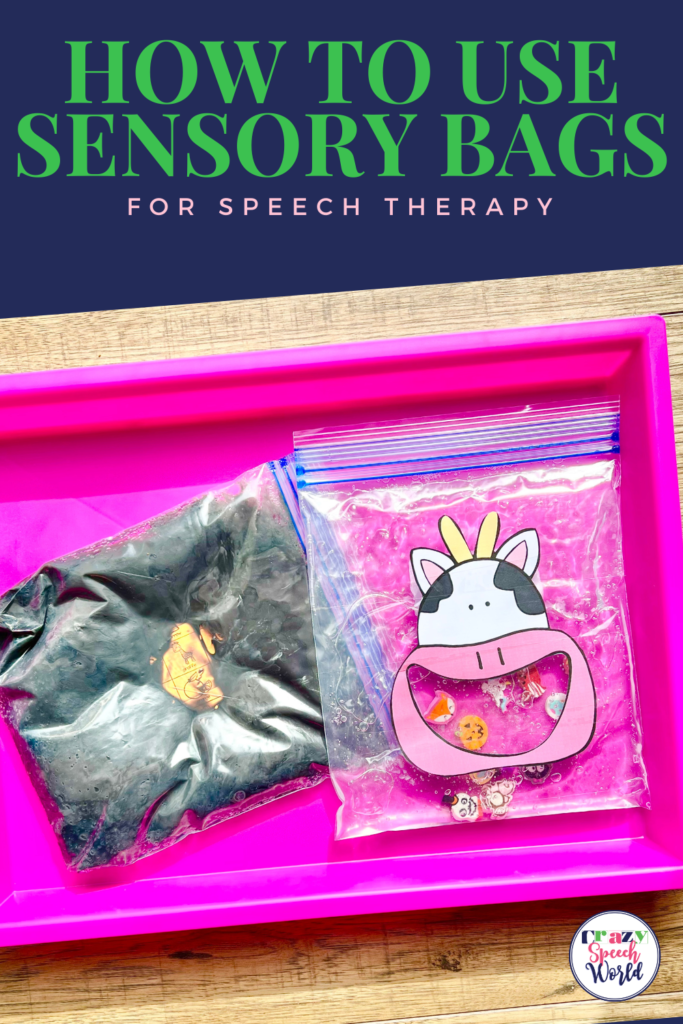
Hey friends! This week I wanted to share an idea that has so many possibilities…sensory bags! This isn’t the first time that I’ve blogged about these, but I wanted to revisit and revamp with some new ideas for year-round use.
The first time I used this as a therapy tool, I had incredible engagement from the children I was working with. Since then, I have used them many times to work on a variety of skills in the speech therapy room.
Materials
- Clear zipper bags – I recommed freezer bags since they are a bit thicker
- Clear packing tape – you can use this to attach things to the bag AND for sealing the zipper so it doesn’t pop open
- Hair gel – I found a big bottle at the Dollar Tree for a buck, it was enough to create two different quart size bags
- Paint or food coloring – this is to change the color of the gel, if you want
- Mini Objects to put inside
- Printables
Peek A Boo Bag
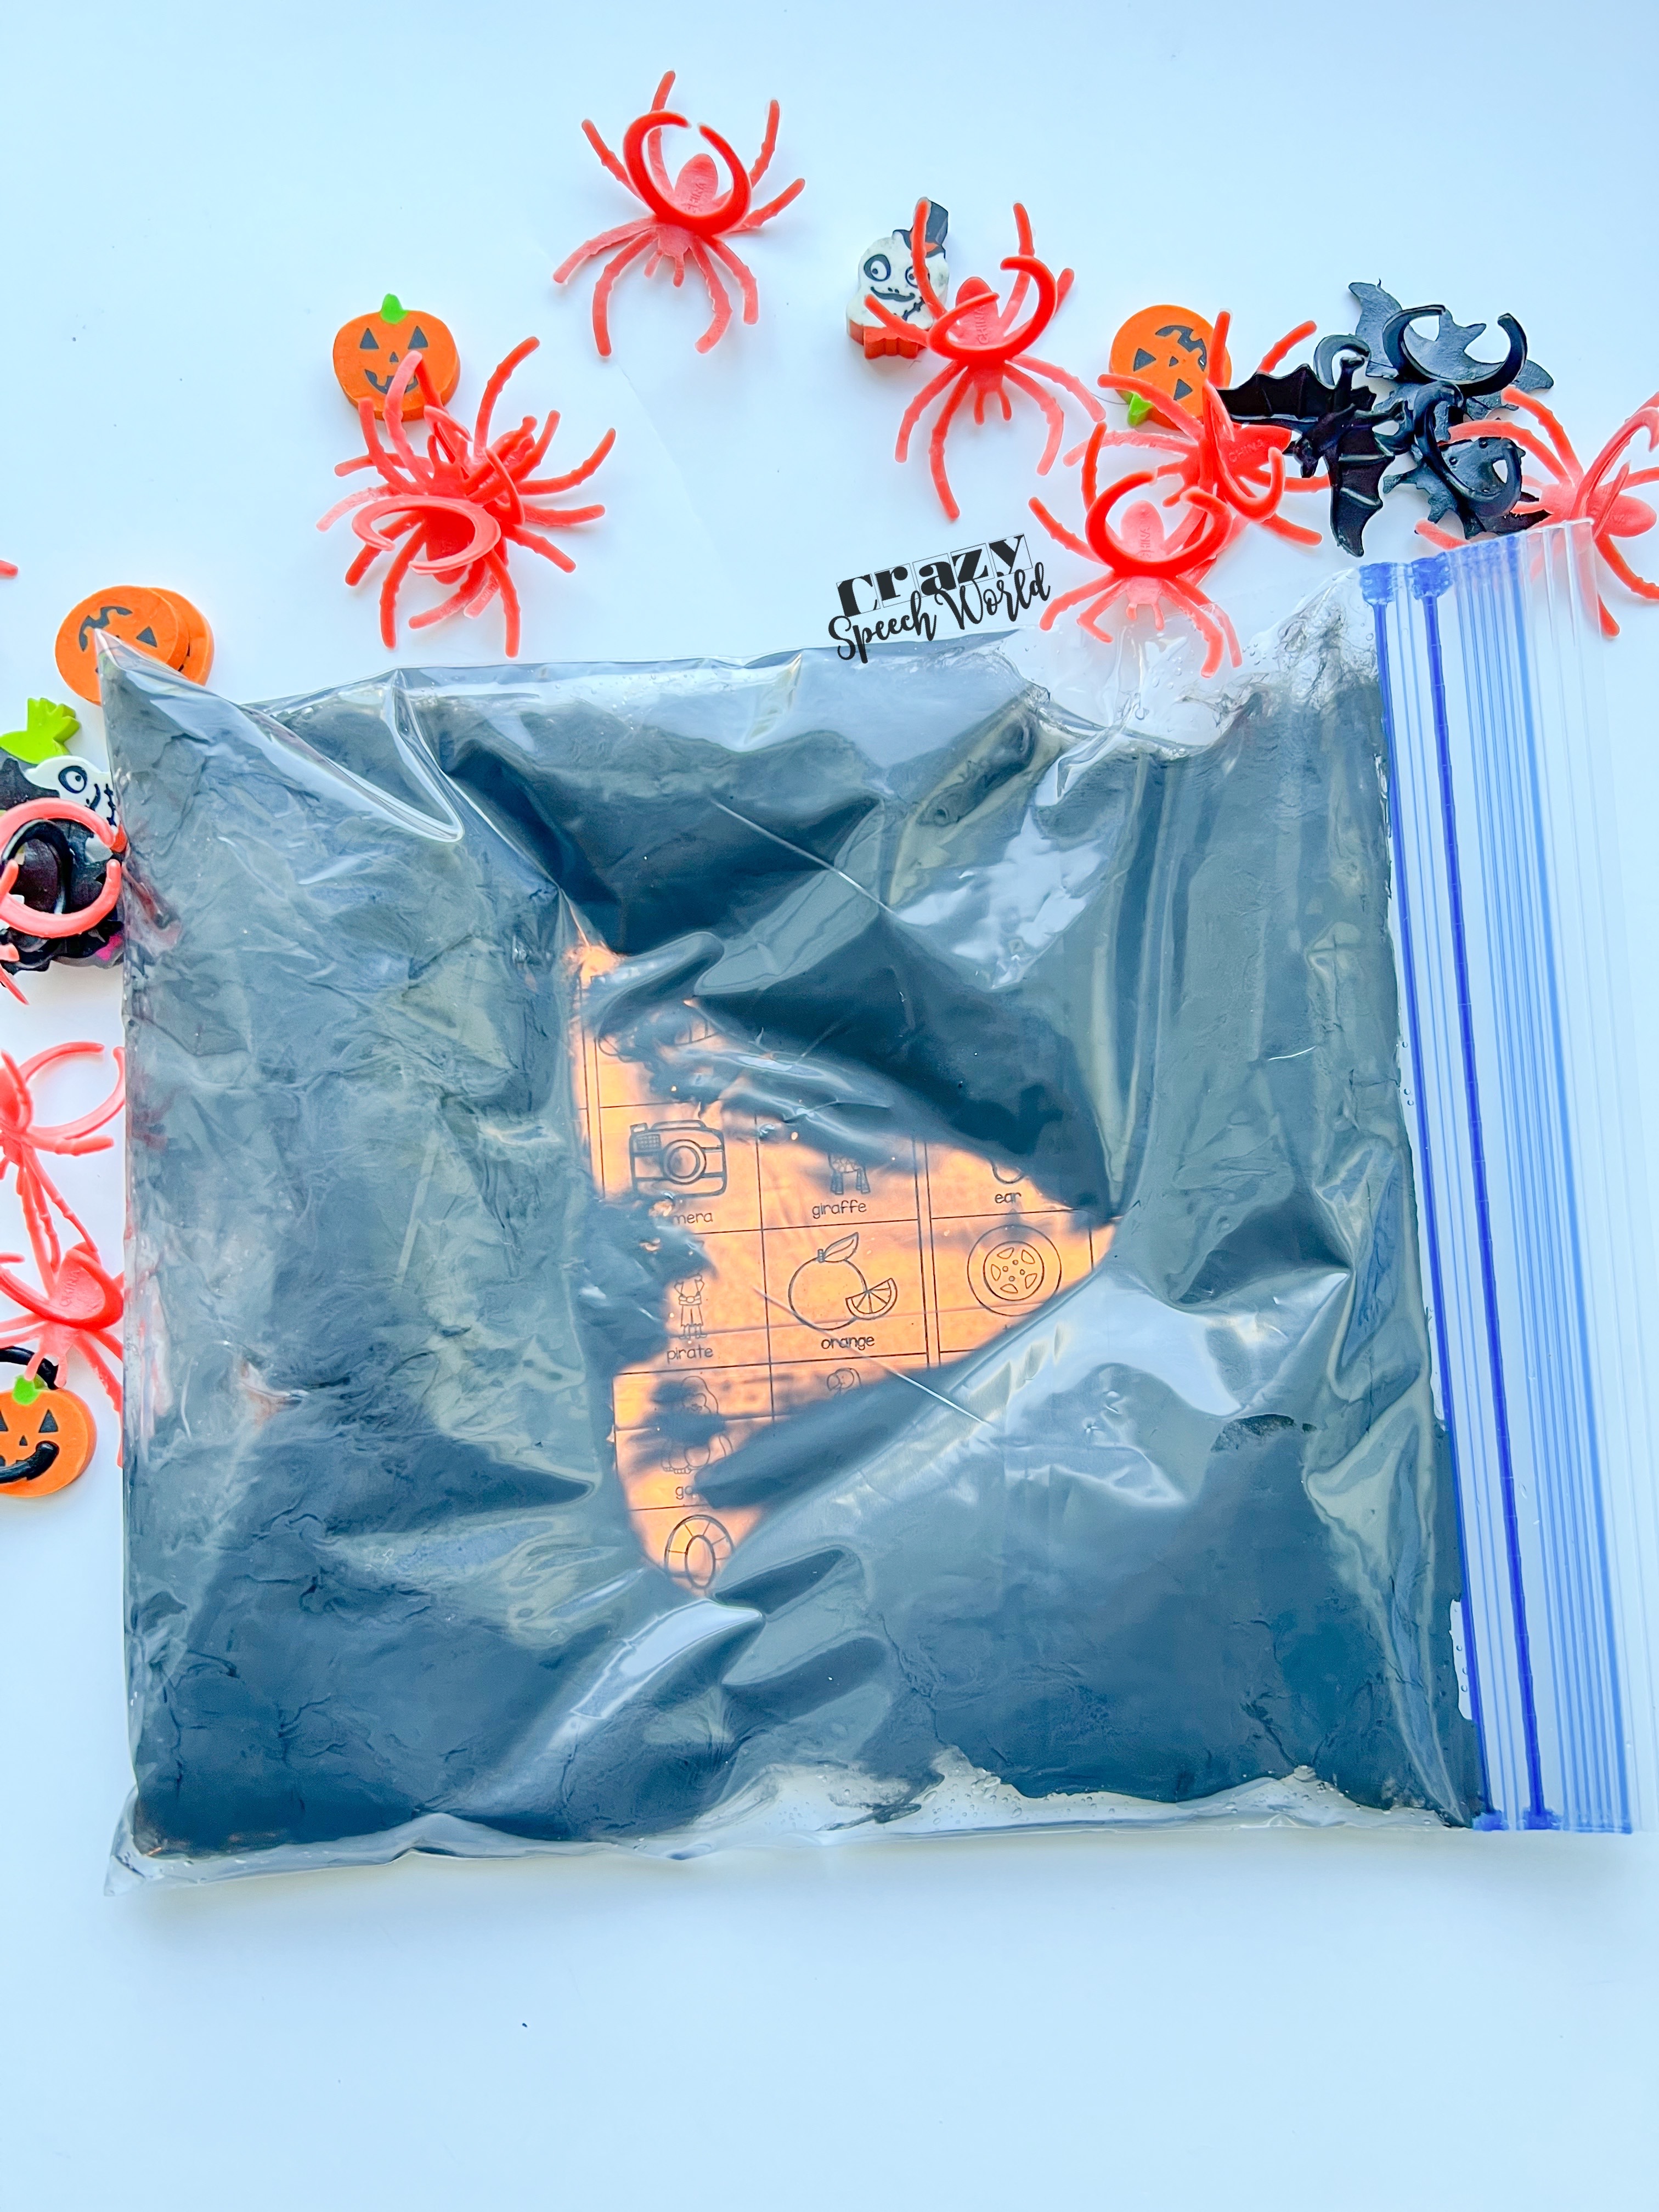
The idea with this version is to create hidden pictures or words, I used this at Halloween but you could do it anytime! You can put a sheet of target pictures behind the bag or use packing tape to put it inside, then fill the bag with the hair gel and a squirt of dark paint. Your students can move the goo around to find the pictures to practice. I used the mini articulation pictures from my monthly toolkits in this example!
Feed the Animal
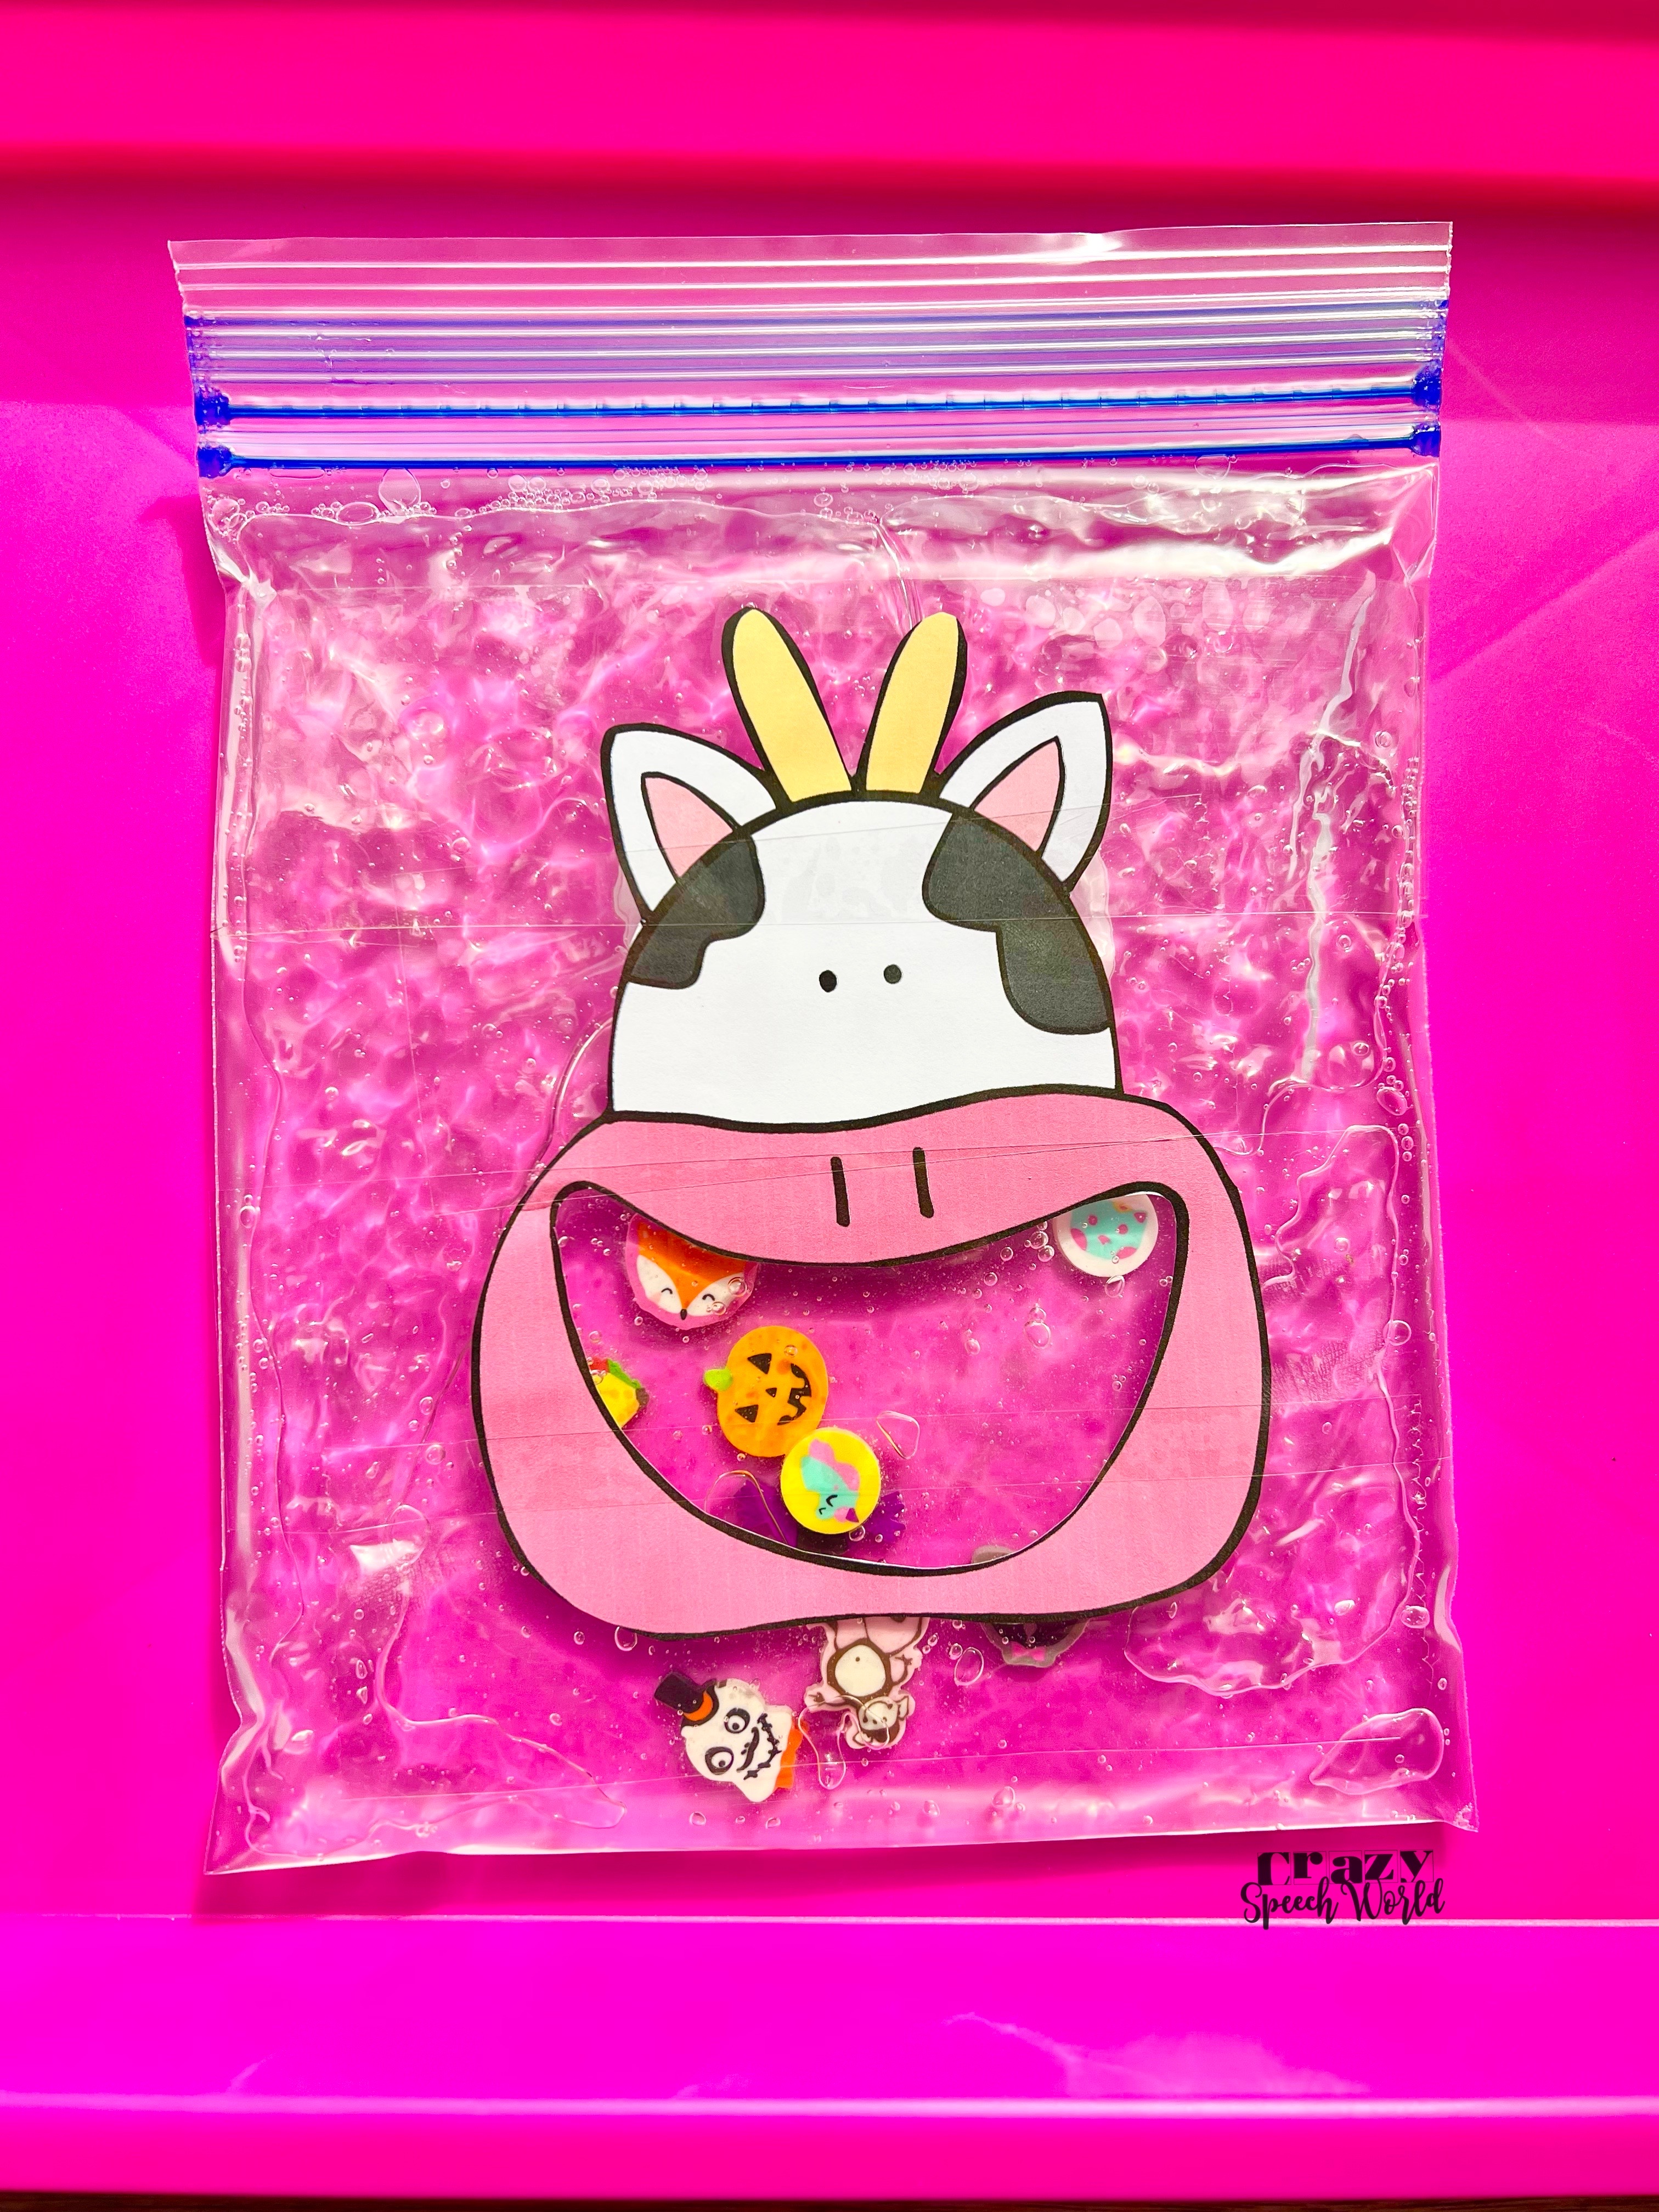
For this one, I printed out an animal and cut out the mouth. Since this student is working on /k/ sound, I chose a cow. Then I filled the bag with hair gel and a little bit of water, along with some mini erasers that have the /k/ sound in them. Now you can ask what’s in the cow’s mouth, move things around, and create silly phrases… and it’s all naturally sound loaded for tons of speech sound practice! You could also easily target verbs (the cow is eating…, the cow ate…) and pronouns (the cow uses the ‘she’ pronoun, she eats the….). This would be great to do with The Old Lady Series! Each of my old lady book companions has an old lady face you could use with the object pictures from each story.
Decorate the Shape
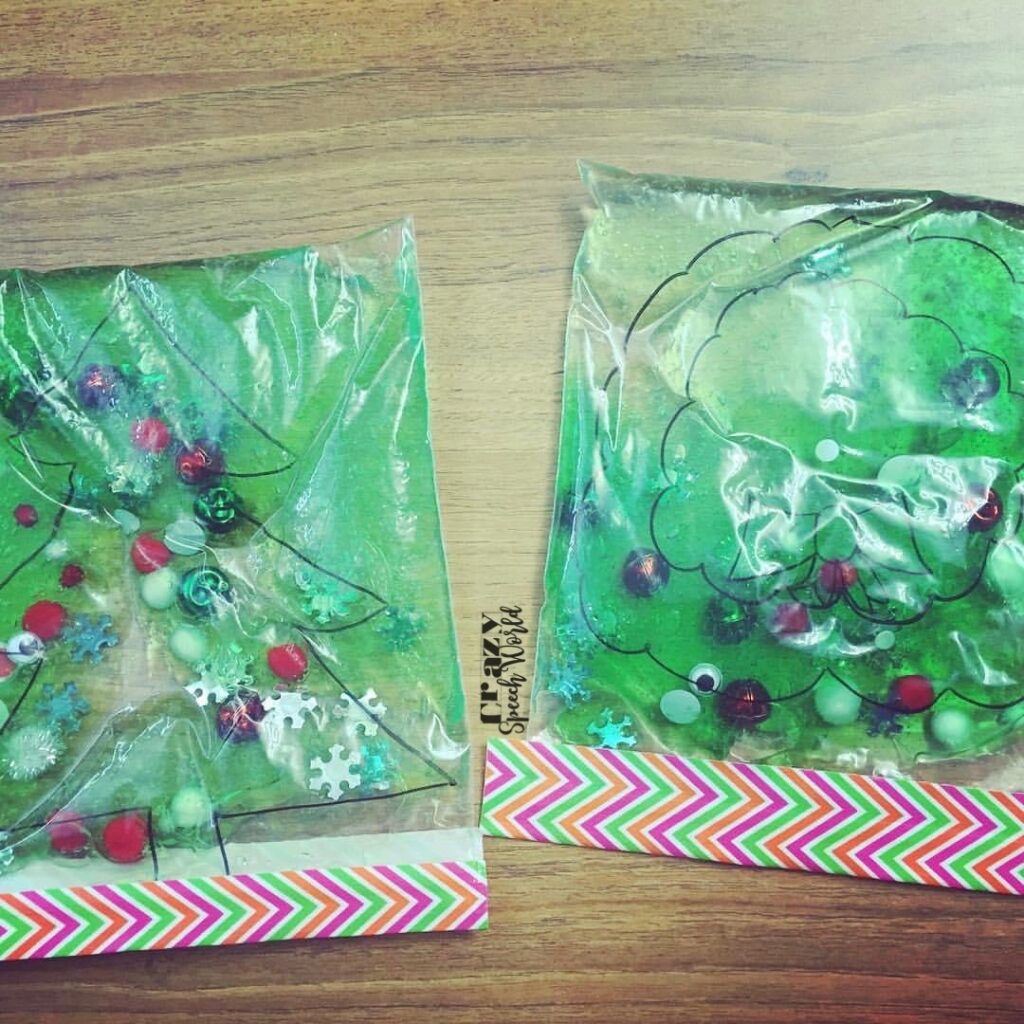
This one is super easy…just draw a shape on the outside with a marker, then add your gel and fillers! For this example, I did a Christmas tree and a wreath, then added poms, jingle bells, snowflakes, and googly eyes. I also used food coloring to dye the gel green 😀 My students just moved them around and we targeted describing words, vocabulary, and basic concepts.
THat’s it! This is a super easy therapy activity that your students will love! And don’t forget to use them on a tray…cause you just never know 😜


![Using open ended activities and games in speech therapy can make planning sessions so much easier! Here are a few suggestions that worked well for me. Do you remember the first time you were faced with a mixed group and were realllllllllly unsure about what to do? I do… picture it, St. Augustine 2007 😅 I was […]](https://i.pinimg.com/236x/db/72/cf/db72cf1f6f5da00cb2a13a90872871ea.jpg)
![Using open ended activities and games in speech therapy can make planning sessions so much easier! Here are a few suggestions that worked well for me. Do you remember the first time you were faced with a mixed group and were realllllllllly unsure about what to do? I do… picture it, St. Augustine 2007 😅 I was […]](https://i.pinimg.com/236x/ae/c5/56/aec55688010e2d3489baf744dde59582.jpg)
![Using open ended activities and games in speech therapy can make planning sessions so much easier! Here are a few suggestions that worked well for me. Do you remember the first time you were faced with a mixed group and were realllllllllly unsure about what to do? I do… picture it, St. Augustine 2007 😅 I was […]](https://i.pinimg.com/236x/18/b9/e8/18b9e80227dfe1789e20a21629254f79.jpg)
![Using open ended activities and games in speech therapy can make planning sessions so much easier! Here are a few suggestions that worked well for me. Do you remember the first time you were faced with a mixed group and were realllllllllly unsure about what to do? I do… picture it, St. Augustine 2007 😅 I was […]](https://i.pinimg.com/236x/4d/34/85/4d3485a753178d000223a89b09162317.jpg)
![Using open ended activities and games in speech therapy can make planning sessions so much easier! Here are a few suggestions that worked well for me. Do you remember the first time you were faced with a mixed group and were realllllllllly unsure about what to do? I do… picture it, St. Augustine 2007 😅 I was […]](https://i.pinimg.com/236x/da/7b/c1/da7bc16b9530451d989a578236bc2bff.jpg)
![Using open ended activities and games in speech therapy can make planning sessions so much easier! Here are a few suggestions that worked well for me. Do you remember the first time you were faced with a mixed group and were realllllllllly unsure about what to do? I do… picture it, St. Augustine 2007 😅 I was […]](https://i.pinimg.com/236x/e0/21/a4/e021a465474b16201d23d0a77857935b.jpg)
![Using open ended activities and games in speech therapy can make planning sessions so much easier! Here are a few suggestions that worked well for me. Do you remember the first time you were faced with a mixed group and were realllllllllly unsure about what to do? I do… picture it, St. Augustine 2007 😅 I was […]](https://i.pinimg.com/236x/fa/94/be/fa94be15b6f184b64e2e408bc762a7e8.jpg)
